NetGear Router Communication
The NetGear Router with the NetBook (small laptop)
(EMC Signs primarily purchased from July 2010 to October 2010)
This is most likely the type of communication you have if you purchased your EMC between July to October 2010. The components for communicating with the sign will look like: A NetBook computer came with your sign. A NetGear external modem is in your electronic message center. The sign is programmed wirelessly.

Problem: I can’t communicate with my sign
Potential Cause: The sign has no power or isn't powered on
Troubleshooting steps:
- Check to see if the sign is powered on
- Check the AC Voltage to sign, and at the main busbar (the electrical panel in your building)
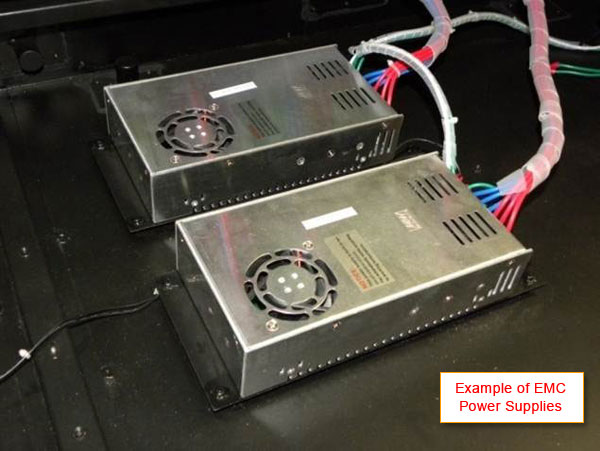
- Check the DC output on the power supplies inside your sign
- close
Potential Cause: The computer isn't in line of sign with the sign
Troubleshooting steps:
- Make sure there a clear view between your computer and the electronic sign. Any type of obstacle can cause the signal to be blocked and your sign won’t receive the message from your computer.
Potential Cause: The computer is too far away from the sign
Troubleshooting steps:
- The wireless system on the computer that came with the sign has a maximum range of 30 feet.
- Make sure you’re within 10 to 30 feet of the sign when sending the message.
Potential Cause: The computer is not connected to a wireless network
In order for your sign to capture messages sent from the SignX software the computer needs to be connected to the “Signtronix” wireless network.
Troubleshooting steps:
- On the lower right hand side of the computer screen look for an icon that looks like a “signal bar” click on it and look for either Signtronix A or Signtronix B
- Click on Signtronix A (or Signtronix B) then click on the “Connect” button
- Note: If you get an error message that reads “Unable to connect to Signtronix, Limited access.” This is fine because you can still send a message to the sign.
Potential Cause: It's a Sign Setup issue
The SignX software may not have been setup properly initially or it may have gone back to default settings. In these cases the best course of action is to go through the Sign Setup process again. There are the steps to set up the sign to communicate with SignX once again.
Troubleshooting steps:
- Open your SignX media editor software
- On the upper left hand side of the software screen click on “File”
- Go to “Sign Setup” (the “Sign Setup” window appears)

Make sure settings on the left hand side of the Sign Setup window are correct – as shown in the example here
Name = Sign1
ID = 1
The “Type” depends on what type of sign you have. This is the matrix (height and width of your sign) plus the color of your sign (RG for tri-color sign and RGB or full for full color sign).
IP Address = 192.168.1.222
If the “Sign Setup” is incorrect then follow the instructions below
- Delete all signs on the left hand side and sign types on the right hand side:
- Select the “Sign” in the column and click the “Delete Sign” button
- Click on “New Type” button
- For “Alias” just leave it blank (optional)
- ” Controller” >> select “C-power 3200”
- ” Sign Width” >> this depends on what type of sign you have – check your documentation
- ” Sign Height ” >> this depends on what type of sign you have – check your documentation
- ” Sign Color” is RG Color if you have a tri-color sign or mono for a monochrome sign
- Click “OK” (this takes you back to “Sign Setup” window)
- Click on “New Sign” button
- Change “Communication” to Network
- Change “IP Address” to 192.168.1.222
- Click “OK”
If you have two-sided sign, you need to set up another sign for Sign 2
From the “Sign Setup” window click on “New Sign” button
The “Sign Setting” window pops up
Change “Communication” to “Network”
Change “IP Address” to 192.168.1.222
“Port” = 5200
“ID Code” = 255.255.255.255
Click “OK” (this takes you back to sign set up window)
Select “Sign2” >> make sure it’s highlighted in blue
Click on “Go to Selected Sign” down at the bottom (this takes you back to the SignX software main page)
Potential Cause: Sign Type is not correct
If the wrong sign type was selected during the Sign Setup process or if the software defaulted back to a different Sign Type, this would cause the software to stop communicating with your sign.
Troubleshooting steps:
- On the SignX software click on “File” and then click on “Sign Setup”
- Select the sign in the left side column (should be highlighted in blue) and click “Delete Sign”. Then select the choices under the “Sign Type” section on the right and click on “Delete Type” button until you no longer have any Sign Types available
- Click on “New Type” and the “New Sign Type” window appears
Change “Controller” to CPower-3200 and change the “Sign Color” to RG color if you have a tri-color sign
Input your “Sign Width” >> this depends on the type of sign you have – check your documentation
Input your “Sign Height” >> this depends on the type of sign you have – check your documentation
Click on the “OK” button
On the SignX software go to “File” and then select “Sign Setup”
Click on “Delete Sign” button to delete the incorrect sign name on the left hand side of the “Sign Setup” window

Click on “New Sign” button
The “Sign Setting” window appears and for “Sign Name” it should read “sign1” , “ID1”

“Sign Type” varies on the type of sign that you have. The “Sign Type” indicates the matrix of the sign or the number of pixels high by the number of pixels wide on your sign. An example of a Sign Type would be 32×144 or 56×144. If you can’t find your sign matrix on your original documentation then please contact us to get it.
“Communication” should be set to “Network”
Change “IP Address” to 192.168.1.222
“Port” = 5200
“ID Code” = 255.255.255.255
Click “OK” (this takes you back to sign set up window)
Select “Sign1” >> make sure it’s highlighted in blue
Click on “Go to Selected Sign” down at the bottom (this takes you back to the SignX software main page)

Potential Cause: There could be EMI (Electro Magnetic Interference)
Troubleshooting steps:
- Try to get as close as you can to the sign when sending a message
Potential Cause: Your wireless radio on your computer may be off
Troubleshooting steps:
- On the lower right hand side of the computer screen look for an icon that looks like a “signal bar” much like one you would see on your cell phone. If you have a red “X” in front of the “signal bar” your wireless radio is turned off
To turn it back on you will need to first locate the switch on netbook
On the left hand side of the netbook where you plug in the AC power cord you will see a switch with icons on each side of the switch
Make sure the switch is set to the icon that has a computer with waves on each side of the computer.
Your wireless radio on your computer may be off
On the lower right hand side of the computer screen look for an icon that looks like a “signal bar” much like one you would see on your cell phone. If you have a red “X” in front of the “signal bar” your wireless radio is turned off
![]()
To turn it back on you will need to first locate the switch on netbook
On the left hand side of the netbook where you plug in the AC power cord you will see a switch with icons on each side of the switch
Make sure the switch is set to the icon that has a computer with waves on each side of the computer.
Problem: I have a “Failed to Open Com” error on my software
Potential Cause: Software Setup Error
Troubleshooting steps:
If you have SignX version 2.0 or later
- In your SignX software go to “File” and then select “Sign Setup”
- Within the Sign Setup window click on “Edit Sign” and the “Sign Setting” window appears
- Make sure that “Communication” is set to “Network”
- The “IP Address” should read 192.168.1.222
- “IP Port” should read 5200 and “ID Code” should read 255.255.255.255
- Click “OK” and on the “Sign Setup” window click on “Go to selected Sign”

Problem: On the Netbook – when I try to connect to the wireless network – it gives me a “Unable to Connect” or “Limited Access” error
Potential Cause: Software Setup Error
Troubleshooting steps:
- Even if you see one or both of these errors you can still communicate with your sign. Proceed with the setup steps as normal.
Problem: Part of my sign doesn’t light up (either an entire section or pixels on the sign)
Potential Cause: Temporary electronic glitch
Sometimes a module may just go out because of a small glitch in the electronics but it doesn’t cause a permanent outage. A simple reboot of the sign fixes this issue in most instances.
Troubleshooting steps:
- Reboot the sign. This must be done at your electrical box by simply turning power off then back on to the sign circuit.
Potential Cause: Loose ribbon cable or bad module
Please use a professional electrician to work inside the sign
Troubleshooting steps:

- ** Make sure your sign is powered down before your electrician performs any work **
- Have a professional electrician open your sign
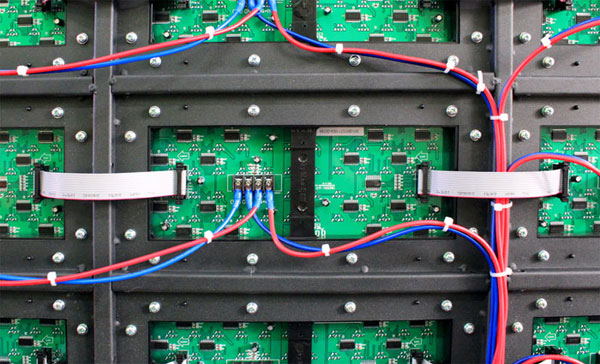
- Have the electrician unplug the ribbon cable from the module (or part of the sign) that isn’t lighting up
![]()
See closeup of a ribbon cable clamp. Here is where you unplug the ribbon cable from the module.
![]()
Plug the ribbon cable back in to the slot from which it was just unplugged
If the module still doesn’t light up then try unplugging that same ribbon cable and plug it into a different module. We are now trying to determine if it is a ribbon cable failure or a module failure.
If the 2nd module still lights up after connecting the potential problem ribbon into the socket, then it is a module issue.
If the 2nd module that WAS working now does not work, then it is most likely a ribbon cable issue.
In either case call Signtronix technical support at (800) 729-4853 ext. 402 to report the problem and order replacement parts.
Potential Cause: Bad Power Supply or Power Cable
For this troubleshooting step you must have an electrician go inside your sign to check the power supply and power cables.
Troubleshooting steps:
- ** Make sure your sign is powered down before your electrician performs any work **
- Have a professional electrician open your sign and perform the work
- Put a power meter on the module that isn’t lighting up and make sure it’s getting power (5V) or (7.5V) DC power
Next put a power meter on the power supply and check the voltage. It should also be getting 5V or 7.5V
If the power on the power supply is fine but the module is not, then it’s most likely a bad cable or module. If the power supply is not getting power, then the power supply is bad. Call Signtronix for maintenance options.
Problem: I sent a message to my sign and the software said the message was sent successfully, but the sign still displays the old message
Potential Cause: It's a Sign Setup issue
Troubleshooting steps:
- Open your SignX media editor software
- On the upper left hand side of the software screen click on “File”
- Go to “Sign Setup” (the “Sign Setup” window appears)
Make sure the settings on the left hand side of the window (under Signs) are correct and are as shown in the example here
Name = Sign1 and Sign2 (If you have two-sided sign)
ID = 1 (and ID = 2 if you have a two-sided sign)
The “Type” depends on what type of sign you have. This is the matrix (height and width of your sign) plus the color of your sign (RG for tri-color sign and RGB or full for full color sign). If you purchased your sign from January 2011 and beyond you can check the sticker on the laptop for your specific sign type.
IP Address = 192.168.1.222
If the “Sign Setup” is not showing the right configuration (as seen in the above example) then follow the instructions below:
- Within the “Sign Setup” window select the various “Signs” choices in the left column and click “Delete Sign” for each one. Do the same for the “Sign Types” on the right side. Select each one and click “Delete Type” so no Sign Types are listed
- Next, click on the “New Type” button and the “New Sign Type” window will appear. Now make sure the following information shows in your New Sign Type window:
- The “Alias” should be left blank
- In the “Controller” field select “C-power 3200” for monochrome and tri-color (RG) signs
- The “Sign Width” (determined by number of pixels wide on your sign) depends on the model /type of sign you have – check your documentation to determine your sign width
- The “Sign Height” (determined by number of pixels high on your sign) depends on the model / type of sign you have – check your documentation to determine your sign height
- The “Sign Color” depends on the mode / type of sign you have. Do you have monochrome (mono) or tri-color (RG)?
- Click “OK” (this takes you back to “Sign Setup” window)
- Within the “Sign Setup” window click on “New Sign” button
- The “Sign Setting” window appears and for “Sign Name” it should read “sign1” , “ID1”

- “Sign Type” varies on the type of sign that you have. The “Sign Type” indicates the matrix of the sign or the number of pixels high by the number of pixels wide on your sign. An example of a Sign Type would be 32×144 or 56×144. If you can’t find your sign matrix on your original documentation then please contact us to get it.
- Now change the “Communication” setting to “Network”
- Change “IP Address” to 192.168.1.222
- “Port” = 5200
- “ID Code” = 255.255.255.255
- Click “OK” which then takes you back to “Sign Setup” window. Then click “OK” to exit.
Problem: The time on my computer is correct but the sign is not displaying the correct time
Potential Cause: It's a Sign Setup issue
Troubleshooting steps:
Make sure your computer has the right time set
If your computer has the right time… Open the SignX software:
Click on “Run” in the top menu then select “Date, Time & Temperature”
The “Date, Time & Temperature” window pops up
It will display the correct time on the window but still click the up and down buttons next to the time until you see the right time then click “Set to Sign”
Now check the sign. It should be displaying the correct time.
Problem: I programmed part of my message to scroll, and I told it to scroll only one time, but the message scrolls 3 or 4 times instead of just the one
Potential Cause: It's a Software issue
Troubleshooting steps:
- This is a bug that occurs with SignX version 2.06. To eliminate this issue please upgrade to SignX version 2.08 which can be found at the Signtronix.com website.
- Visit www.Signtronix.com
- Click on the “Customer Support” link on the left
- Click on the “Sign Software” link that appears “Customer Support”
- Now download and install the “SignX 2.08 Software” that is at the top of the page